How to Arrange a Gorgeous Bouquet from U-Pick Flowers
There’s something magical about wandering through a flower field, basket in hand, snipping stems and collecting nature’s brightest treasures. But the fun doesn’t have to end there. Once you’ve hand-picked your blooms at The Romestead Flower Farm, you have the joyful opportunity to transform them into a stunning bouquet—one that reflects your unique style and celebrates the season.
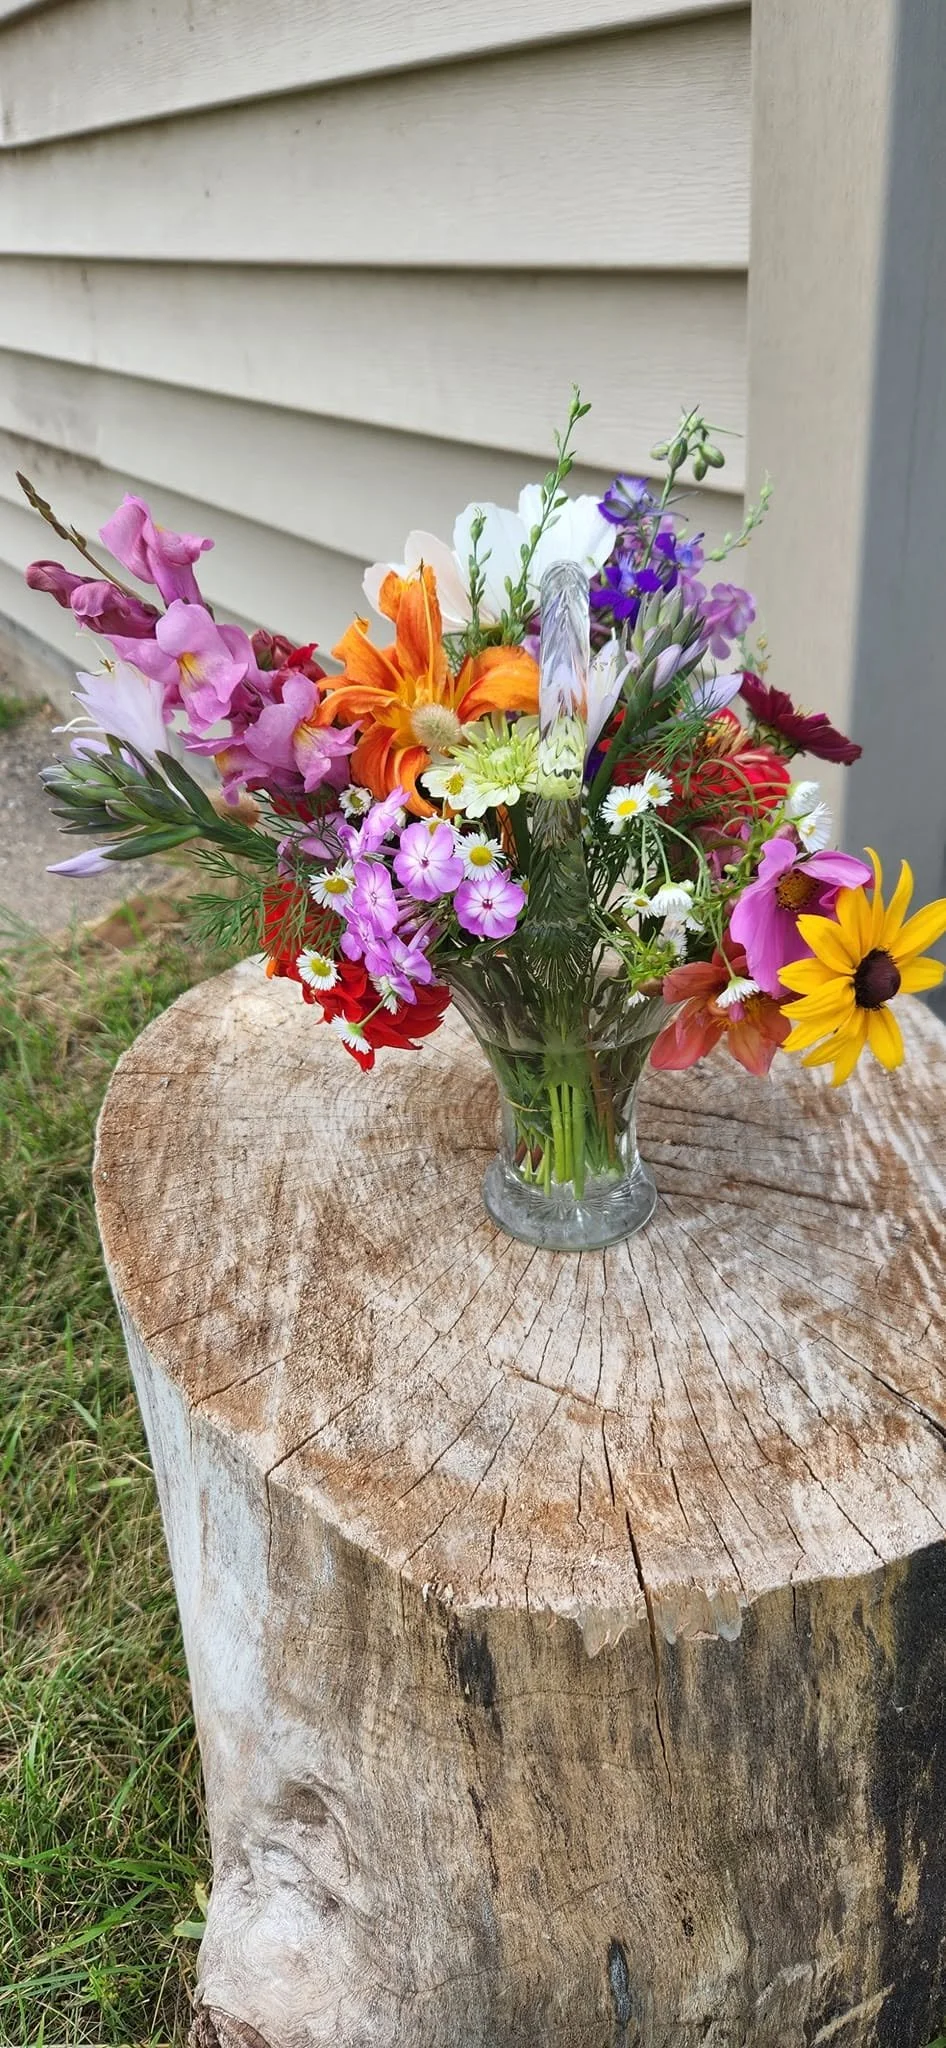
If arranging flowers feels intimidating, don’t worry—you’re in good hands. With a few expert tips (and a little creative freedom), you can design a bouquet that looks like it came straight out of a professional studio. In this article, we’ll walk you through the process step by step: from choosing the right flowers in the field to arranging them into a gorgeous, long-lasting display once you get home.
Whether you’re crafting a gift for a friend, a centerpiece for your table, or simply a treat for yourself, let’s turn your hand-picked stems into a floral masterpiece.
Step 1: Choose the Right Flowers in the Field
The best bouquets start with the best flowers. At The Romestead Flower Farm, we grow a wide range of blooms all season long—from early spring sweet peas and snapdragons to midsummer zinnias and sunflowers, and fall’s fabulous dahlias.
Here’s what to look for while you’re picking:
1. Freshness is Key
Look for blooms that are just starting to open or are at their peak—not fully blown out. Flowers that are too open may wilt quickly, while tight buds may never bloom after cutting.
2. Strong, Healthy Stems
Choose stems that feel sturdy and straight. Avoid any that feel floppy or have yellowing leaves.
3. Variety Is Beautiful
A good bouquet includes a mix of flower types, sizes, and textures. Try picking:
Focal flowers – big blooms like dahlias, sunflowers, or zinnias
Supporting flowers – medium-sized, pretty fillers like cosmos, snapdragons, or celosia
Filler and foliage – greenery, grasses, or delicate blooms like ammi or feverfew to round it out
Don’t be afraid to mix colors, shapes, and styles. That’s the joy of a u-pick bouquet—it’s entirely yours!
Step 2: Keep Your Flowers Happy During Transport
Before arranging your bouquet, it’s important to care for your flowers right after picking. These little steps make a big difference in how long your arrangement lasts.
At The Romestead Flower Farm, we recommend:
Placing stems into cup with water as soon as you pick
Cutting your stems at an angle with sharp snips or scissors
Keeping your cup shaded or cool while you finish picking
Once home, get your flowers into clean water as soon as possible. If you can’t arrange them right away, store them in a cool place out of direct sun.
Step 3: Prepare Your Workspace
Before you dive into arranging, set yourself up for success:
Find a clean, clutter-free surface like a kitchen table or counter.
Have your tools handy: sharp floral snips, a clean vase or jar, and optional floral tape or string.
Clean your flowers: remove any leaves that will sit below the waterline in your vase—this helps prevent bacterial growth.
Recut your stems: just before arranging, give each stem a fresh angled cut under running water.
Pro tip: Use lukewarm water in your vase, and consider adding a packet of flower food if you have one—or make your own with a pinch of sugar, a splash of lemon juice, and a drop of bleach.
Step 4: Build Your Bouquet with Balance and Flow
Now for the fun part: putting it all together!
1. Start with Greenery or Fillers
Place a few stems of foliage or airy fillers (like dill, basil, or feather celosia) in the vase first. This helps create a framework for your bouquet and gives the other flowers something to lean on.
2. Add Focal Flowers
Add your biggest, boldest blooms next. Space them out evenly so the bouquet feels balanced. Don’t cluster them all in one spot unless you’re going for a bold, modern look.
Examples: Sunflowers, dahlias, lisianthus, hydrangea
3. Layer in Supporting Flowers
Now add medium-sized flowers around and between the focal points. These provide rhythm and depth to your design.
Examples: Zinnias, cosmos, snapdragons, marigolds
4. Use Odd Numbers
Designers often use odd numbers of each flower type (3, 5, 7) to create a more natural, flowing look. Even numbers can feel too symmetrical or stiff.
5. Step Back Often
Take breaks as you build your bouquet to view it from different angles. Rotate your vase to check for balance and fullness on all sides.
6. Add Whimsy and Movement
Finish with playful elements like trailing vines, grasses, or a surprise color pop. These bring life and motion to your arrangement.
Examples: Love-in-a-mist seed pods, curly willow, ornamental grasses, vines
Step 5: Play with Color, Texture, and Height
Great bouquets are a sensory experience. Here’s how to make yours sing:
Color:
Analogous colors (like pinks, purples, and reds) feel harmonious and soft.
Complementary colors (like purple and yellow or blue and orange) create contrast and drama.
Monochromatic (all one color, different shades) feels elegant and cohesive.
Don’t overthink it—trust your eye and intuition. If a combo makes you smile, it’s perfect.
Texture:
Mix different textures for depth and interest. Combine velvety celosia with delicate cosmos, spiky globe amaranth with soft lisianthus, or smooth sunflowers with wispy grasses.
Height:
Vary the height of your stems within the bouquet. This gives your arrangement shape and natural movement, rather than a stiff, flat dome.
Bonus: The “Spiral” Method for Hand-Tied Bouquets
If you’d like to create a hand-held bouquet to wrap and gift, try this florist technique:
Hold the first stem in one hand, and place each new stem at an angle, rotating the bouquet as you go.
This creates a “spiral” of stems and allows the bouquet to flare outward naturally.
Once full, tie the stems securely with twine or raffia.
Recut stems evenly and place in a vase or wrap in damp paper towels to keep fresh.
This method takes a little practice but is worth learning if you love making gift bouquets.
Step 6: Keep Your Bouquet Fresh for Days
A gorgeous bouquet deserves to last. Here’s how to extend its life:
Change the water every day or two.
Re-trim the stems every few days to keep them open and hydrated.
Keep the vase out of direct sunlight and away from fruit. (Ripening fruit releases ethylene gas, which causes flowers to wilt faster.)
Remove spent blooms as they fade to keep the bouquet looking fresh.
With proper care, many of our U-pick flowers will last 5–10 days or more!
Step 7: Make It Your Own
The most beautiful bouquets are the ones made with love and intention. Don’t worry about following every “rule.” Let your creativity lead the way. Arrange intuitively. Add flowers that speak to you. Include herbs or wild stems you found along the fence line. Let your bouquet be a reflection of your mood, your season, your style.
Some fun ideas to try:
A cheerful sunflower-and-zinnia bouquet for a friend’s birthday
A soft peach-and-cream arrangement for your bedside table
A moody burgundy and plum bouquet for your fall kitchen
A mixed herbal bundle with basil, mint, lavender, and feverfew
The possibilities are as endless as our flower rows.
Final Thoughts: From Field to Vase with Joy
At The Romestead Flower Farm, we believe in the beauty of simplicity and the power of personal connection—to the land, the seasons, and each other. Arranging a bouquet from your own hand-picked flowers isn’t just about decorating your home. It’s about slowing down, tapping into your creativity, and celebrating life’s little joys.
So next time you visit, take your time in the field. Pick what speaks to you. Then bring it home and make something truly your own.
We’re here to help every step of the way—whether it’s with picking tips, design ideas, or arranging workshops on the farm. Stop by, ask questions, and share your bouquets with us on social media! (Don’t forget to tag us: @theromesteadflowerfarm)
Happy picking—and even happier arranging!
